Kids + Micro-Signals: Teach 3 Early Warning Cues in 5 Minutes
Oct 30, 2026 • 8 min
Start here: you don’t need an hour, a dog trainer, or a lecture to teach a kid how to spot a warning. You need five focused minutes, a clear phrase, and a tiny practice routine you’ll actually repeat.
This post is a tiny lesson plan for parents and caregivers. It teaches three subtle dog signals—lip lift, freeze, paw lift—how to explain them to kids, and what children should do when they see them. There are quick role-play scripts, a note on safety, and a printable-ready mindset so you can do this in the kitchen before bedtime or in the park between swings.
Why this matters: dogs often warn before they bite. Those warnings are easy to miss because they’re quick and small. If kids can catch the whisper before the shout, we avoid a handful of emergencies every year.
The three micro-signals (say them like this)
Think of these as the dog’s tiny warning light. Teach kids the name, show a picture, and practice the physical response once. Use words that stick.
- Lip lift — “tiny secret smile”
- Freeze — “statue”
- Paw lift — “testing the ground”
Short, visual, repeatable.
Lip lift (the tiny secret smile)
What it looks like: a subtle upward curl of the upper lip, maybe a tooth edge showing for a split second. Not a snarl. Not full-tooth baring—just tension.
Tell a kid: “That’s the dog’s tiny secret smile that means ‘please stop.’” What to do: stop reaching, turn sideways, take three slow steps back, and tell an adult.
Why parents miss it: it’s so brief. Many of us wrote it off as a weird face. Once you see one on video you’ll notice them everywhere.
Freeze (the statue)
What it looks like: total stillness—body tense, breath held, focused stare. Different from a relaxed sit.
Tell a kid: “The dog turned into a statue. Statues don’t like hugs right now.” What to do: be a statue too (stop), then slowly turn and back away. No loud noises, no sudden moves.
Why it’s dangerous: people read calm as consent. This is often the calm before a defensive action.
Paw lift (testing the ground)
What it looks like: one paw lifts or hovers as if the dog is unsure about its next step.
Tell a kid: “The dog is checking the ground. That means ‘I’m not sure about this.’” What to do: stop, give space, step back slowly, and tell an adult.
Why adults overlook it: it’s easy to think a paw lift is play or that the dog is waiting for a treat. Context matters.
The five-minute lesson plan (exactly what to say and do)
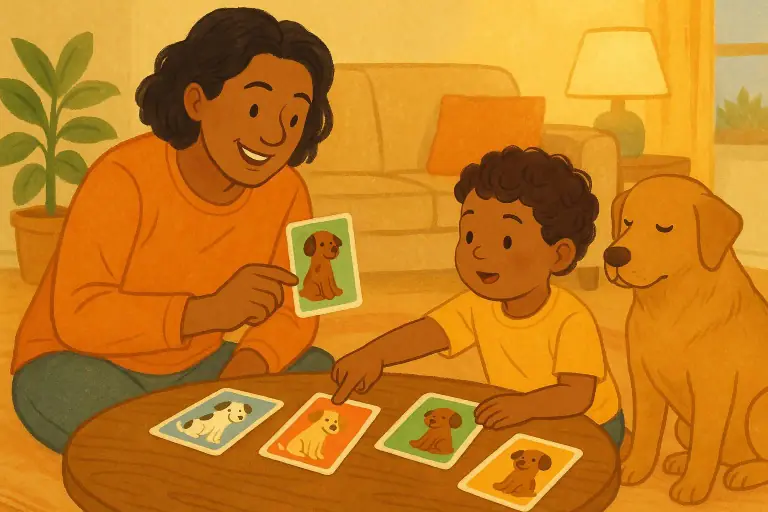
You’ll need flashcards or one phone image per cue. Spend five minutes this way.
Minute 0: Gather. Four cards—Lip Lift, Freeze, Paw Lift, and “What to Do.” Show them to the child. Explain you’ll play a quick game called “See the Whisper.”
Minute 1: Teach names and quick phrases. Show the lip lift image and say: “Tiny secret smile = stop.” Move on.
Minute 2: Demonstrate each cue physically (parent acting or video). Make it dramatic but calm: lip lift, freeze, paw lift.
Minute 3: Practice response. You call a cue, the child does: stop, turn sideways, three slow steps back, tell an adult.
Minute 4: Role-play a tiny scenario and praise. “Great catch—good space-giver!”
Do this three times over a week and once a month after that. Repetition is the point, not perfection.
How to role-play safely (short scripts)
Keep scripts short, positive, and supervised. Use a calm family dog if available, but never force the dog into stress.
Script A (Parent as dog): Parent: (mild lip lift, relaxed voice) “I feel weird about that hug.” Child: (stops reaching, turns, backs away) “Okay, I’m stepping back.” Parent: (relaxes) “Thanks for giving me space.”
Script B (No dog, parent as actor): Parent: (freezes) “I’m a statue.” Child: “Stop—turn—back.” Parent: “Perfect. You kept us safe.”
These scripts are short so kids don’t tune out. Keep tone friendly, not scary.
Age-adapted language: how to say it for 4, 7, and 10-year-olds
4-year-olds: Use play language and mimicry. “The dog made a tiny ‘uh-oh’ face. We say ‘uh-oh—back away.’”
7-year-olds: Explain the why briefly. “Dogs tell us with tiny signals. If we miss them, the dog might get scared. We give space.”
10-year-olds: Add context. “Also check the tail, ears, and whether the dog is being held. Micro-signals mean ‘I need space now’—that’s different from ‘I want a treat.’”
Adjust your expectations: a 4-year-old won’t reliably act alone. They can recognize and ask for help, and that’s huge.
A real story (what I did and what happened)
A few years ago my nephew—age six—decided to climb onto our elderly lab for a “cuddle.” The dog was family, calm most of the time, but she sometimes showed tiny signs when overwhelmed. I’d taught my nephew the “statue” trick the week before.
When he leaned in, the dog froze like a sculpture. My nephew stopped mid-hug, turned like we’d practiced, and took three slow steps back. The dog exhaled, relaxed, and walked away to her bed. No scolding, no drama—just a quiet “thank you” from me and a big high-five for him.
That moment stuck because it was simple, quick, and worked. My nephew later told his mom he felt proud because he didn’t “spoil the dog’s day.” The best part: the dog stayed family and everyone stayed safe.
A tiny detail that stayed with me (micro-moment)
The smell of the dog’s collar when she walked away—like old leather—was oddly comforting. It’s a small sensory anchor I use when I teach the cues: “Remember the collar smell? That was the sound of the danger passing.”
Safety rules every parent should say out loud
- Never force the dog into role-play.
- Always supervise kids around dogs under 10.
- Teach kids to tell an adult—fast.
- If a dog growls after a missed signal, back away and tell the nearest adult immediately.
Also say it without drama: “We practice so our play stays fun. If the dog shows a warning, we stop and tell an adult.”
Common questions and answers (short)
Q: How often should we practice? A: Five minutes, three times in the first week, then once a month as a refresh.
Q: What if the child misses a cue and the dog growls? A: Calmly back away, find an adult, and give the dog space. Teach kids to avoid sudden moves and to not run.
Q: Can micro-signals be different across breeds? A: The basic idea—small, early warnings—holds across dogs, but specifics (ear shape, muzzle) vary. Teach the three cues as a starting point; add breed context later.
Make your own flashcards (quick how-to)
Use any flashcard app or print simple images. One side: picture of cue. Other side: kid phrase + three-step response (Stop / Side / Back + Tell an adult). If you want a free tool, simple print-to-PDF from a phone image works fine.
If you use an app with spaced repetition, schedule a one-week follow-up—kids forget quickly without reinforcement.
Context matters: look at the whole dog
Micro-signals are part of a conversation. Teach kids to glance for clusters: tucked tail, pinned ears, lip-licking, and the three cues together are stronger. But the three cues are a practical first filter—catch them early and you cut risk dramatically.
Final note for parents (how I recommend you start)
Do it now. Five minutes after dinner, show one card and practice the “statue” response. Make it a game. Praise the attempt. If you repeat this tiny routine twice a week for a month, your child will have the muscle memory to pause when it counts.
This is not fear training. It’s safety training—small, calm, repeatable—so kids can enjoy animals without getting hurt and dogs can keep their dignity.