Odor Ninjas: Natural & Non-Toxic Tricks That Eliminate Litter Box Smells
Jun 4, 2026 • 9 min
If you share a home with a cat, you’ve smelled it before—the moment you walk into the room and that sharp ammonia note slaps you in the face. There are plenty of commercial deodorizers out there, but a lot of them come with a not-so-subtle caveat: strong scents, additives, or little warning labels that say “for pets.” I want clean air that’s safe for my cat, not a chemical fog that makes us both sneeze.
What you’re getting here is a practical, non-toxic playbook. It blends science-y basics with real-world tweaks I’ve actually tested in my own house. Think natural litters that absorb and neutralize, safe additives you can trust, smart ventilation that doesn’t turn your living room into a wind tunnel, and a few DIY deodorizers you can mix up in minutes. It’s not about masking odors with perfume; it’s about curating an environment where odors don’t stick around in the first place.
A quick note before we dive in: the goal is fast wins that don’t compromise your cat’s health. I’ll give you expected effectiveness, time-to-results, and practical safety notes. If you’re starting fresh, you can implement a few steps today and see improvement tomorrow. If you’re already mid-journey, you’ll find faster paths and smarter maintenance routines.
And if you want a bite-sized memory jog, there’s a micro-moment tucked in below. It’s one small thing that stuck with me after a long Sunday deep-clean.
Here’s the honest truth I learned the hard way: you can’t bolt a fancy deodorizer onto a box and call it a day. Odor control is a system, not a single trick. When I treated it like a system, I finally stopped arguing with the smell and started steering the ship.
Now, let’s get practical.
The foundation: pick the right litter from the start
You don’t win odor control in the trenches with a single product. You win with a litter that actively reduces odor and stays reliable if you scoop regularly. Here are the two most practical bases I’ve found.
- Natural, clumping litters. Think corn-based options (like World’s Best Cat Litter) or biodegradable walnut shell or wheat-based litters. They tend to clump well, trap odors, and release less dust than dusty clay varieties. The trade-off is price and sometimes clump strength, but for many homes this is a net win.
- Silica gel “crystal” litters. They’re superb at moisture and odor control right out of the box. The upfront cost is higher, but you’ll scoop less often and notice the box stays fresher between changes.
Effectiveness you can count on:
- Silica crystals: High odor control, immediate if you switch right, but long-term cost varies.
- Corn/wheat/walnut litters: High on odor control, medium-to-high for most rooms, dust-free in most cases.
Time-to-results:
- Immediate after you switch. You’ll notice less odor from the first scooping cycle.
Safety notes:
- Avoid added synthetic fragrances and essential oils in the litter. A lot of cats aren’t fans of strong scents, and some essential oils can be irritating or toxic if ingested or inhaled in certain concentrations.
Real-world aside: I once did a side-by-side test in my small apartment. I swapped a standard clay-litter setup for a silica-based option in one box and a corn-based litter in another. Within 24 hours, the silica setup smelled notably cleaner even before scooping. The corn-based box followed closely by the second day. The lesson wasn’t that one is “miracle fuel” for odors; it’s that the base litter absolutely changes the baseline smell of the room. If your base is already hard to mask, you’ll be fighting this battle uphill. Pick a good base first.
Micro-moment: I was sweeping the living room and could smell a hint of something off near the litter box. I paused, checked the box, and realized the room’s airflow wasn’t moving well. A tiny computer fan, tucked on a shelf, shifted air toward an open window. The room smelled better within a few minutes. Small detail, big impact.
Section one: safe, strategic additives that actually help
You don’t need a cabinet full of chemicals to keep smells down. A few safe additions can tilt the odds in your favor.
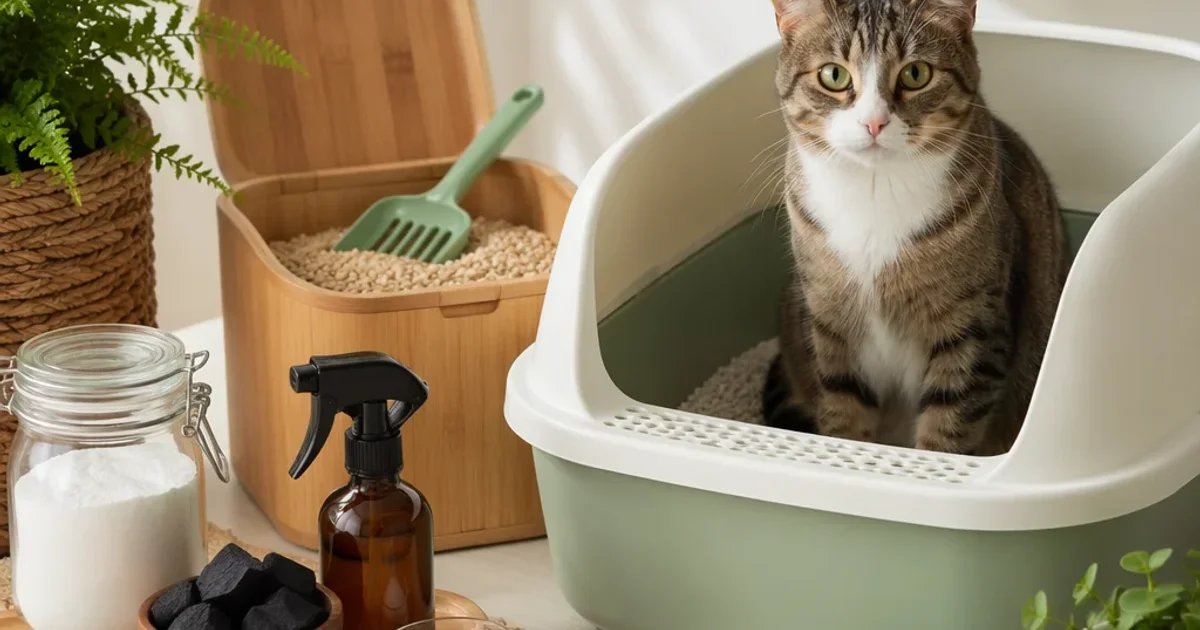
- Activated charcoal: A natural odor magnet. It traps odor molecules, not just masks them. It’s typically safe for cats when used in appropriate forms (like litter additives and packaging designed for pets). The key is to monitor and avoid loose, dusty powders near cat access. If you opt for charcoal, use tested products designed for pet use rather than loose bulk powders around the box.
- Baking soda: A classic. It neutralizes odors and is generally safe in small amounts mixed into the litter. The caveat: less is more. A lot of stories—mine included—veer into sneezing or discomfort if you overdo it or place an open bowl next to the box. My rule of thumb: sprinkle a light layer on fresh litter or mix in at a low ratio. If you smell a sharp bottle-like scent, you probably went too far.
- Enzymatic cleaners alongside the litter base: These break down waste compounds, complementing odor-absorbing litters and baking soda. Use them after a full box clean, not as part of the daily scoop cycle.
Effectiveness:
- Charcoal: High, when used correctly (in a packet or tray designed for litter boxes).
- Baking soda: Medium to high, depending on how you apply it.
- Enzymatic cleaners: High for eliminating residual organic odors after scooping.
Time-to-results:
- Immediate for the right charcoal or baking soda use; enzymatic cleaners take a cleaning session but set you up for a few days of fresher results.
Budget-friendly picks:
- Unscented activated charcoal powders designed for pet products (bulk purchases save money).
- Standard baking soda (the kind you’d use in baking, not the supermarket “freshner” version with additives).
Story time from my kitchen: Last year, I had a box that always carried a faint ammonia hint—no matter how often I scooped. I switched to a natural litter first, then added a charcoal insert designed for litter boxes. Within two days, the room smelled significantly better, and I noticed I could go a full day between scoopings without the box becoming overpowering. The change wasn’t “one trick.” It was layering base litter with a responsible odor absorber and pairing it with consistent scooping. No drama, just a quieter room.
Section two: ventilation and placement—work with your space, not against it
If the room’s air is stagnant, even a pretty good litter setup can lose ground. The goal is to move odors away from your nose and your cat’s comfort zone.
- The “two or more” box approach in a multi-cat home isn’t just about reducing litter dust or sharing space. It’s about reducing odor concentration. The N+1 rule gives you a safer rule of thumb: for N cats, use N+1 boxes and place them in varied, ventilated spots around the home.
- Use quiet fans or small air purifiers near the litter zone, but point the airflow away from your cat’s lounging areas. A purifier with a carbon filter can help catch the VOCs that slip past the box.
- Open windows and doors, if possible, during cleaning days to promote cross-ventilation. If you’re in a city with limited airflow, consider a compact purifier that runs quietly in the background.
Real-world note: A friend of mine runs a two-box setup in a medium-sized apartment. They kept the boxes in adjacent bedrooms with doors open during the day and a small fan that pushes air toward the living area’s window. It made a noticeable difference in odor levels in the shared spaces, and no one had to live in a “box-zone.” The lesson: you don’t need to rip out walls to get better air—just a smarter fan placement and a little airflow science.
Effectiveness:
- Ventilation and airflow: Medium to high, depending on the room and the number of boxes. Time-to-results: Immediate when you adjust airflow.
Safety notes:
- Don’t point fans directly at the cats’ faces.
- If you’re using a purifier, choose a model with a carbon filter and avoid devices with strong fragrances or ozone-based technology.
Section three: liners, cleaning rituals, and the “how often” question
A lot of odor control hinges on how you clean and how you manage the box between changes. Here’s what I’ve learned from trial and error (and a lot of messes).
- Liners: They’re a mixed bag. They save time, but cheap liners can tear and let urine soak into the box’s plastic. Durable, drawstring liners cut down on mess but add a bit more prep. If you’re changing liners every 2–3 days, you’ll likely notice a big difference in smell and plastic residue.
- Deep cleaning cadence: Empty and scrub the box every 2–4 weeks, depending on the litter type and number of cats. Use hot water and a mild, unscented dish soap. Avoid bleach or harsh sprays—residual odors can irritate a cat’s nose or trigger aversion, and some cleansers leave scents behind that actually smell to a cat as chemicals.
- Box positioning during cleaning: If you’re doing a full clean and the cat is curious, consider placing the box in a calmer, open area for a few hours with the litter removed. Cats are sensitive to changes, and a quick “reset” helps prevent any anxiety from a box being moved during the cleaning cycle.
A practical, budget-friendly routine:
- Deep clean every 2-4 weeks.
- Liners changed every 3 days, or swap to heavy-duty, drawstring liners if you find you’re fighting leaks.
- Maintain a light baking-soda sprinkle between scoops if your base litter doesn’t already include what you need for odor control.
Micro-moment: I once forgot to rotate the box to face away from the doorway while cleaning. The next morning, my cat gave me a very pointed look and then flopped down nearby, clearly signaling “we’re not keeping the box in the drafty hallway today.” It was a tiny reminder that box placement matters as much as the cleaner you use.
Section four: DIY deodorizers you can trust (and how to use them safely)
DIY can be cheap or expensive, but you want things that won’t irritate your cat. Here are a few safe, simple recipes you can try.
- Simple baking-soda deodorizer: Mix 1 cup baking soda with 2–3 drops of cat-safe essential oils (lavender, chamomile, or catnip in tiny amounts). Lightly dust the litter top after scooping—don’t pour into the box and never apply essential oils directly into the litter. The goal is a subtle, not overpowering scent.
- Vinegar rinse for the box after dumping out the litter: Prepare a 1:3 vinegar-to-water solution, scrub the box with it, then rinse with plain water and air-dry before refilling with litter. This helps neutralize ammonia on the box’s plastic surface.
- Coffee-grounds caution: Some people swear by coffee grounds for odor masking, but they can be irritating to cats and are not generally recommended. If you’re curious, try a small, sparse amount in a separate odor-absorbing tray away from the box and see how your cat reacts.
Effectiveness:
- Gentle baking-soda and essential-oil-based scents: Medium when kept light and properly tested for your cat’s tolerance.
- Vinegar rinse: High for residual ammonia on the box and in the air path close to the box.
- Coffee grounds: Risky; generally not advised for homes with cats.
Time-to-results:
- Quick for the vinegar rinse and light baking-soda top-ups; longer for DIY blends that require settling and careful testing.
Budget note:
- DIY solutions save money but require care. Start with one idea at a time to see how your cat responds.
Section five: what I’d do if I started from scratch (a practical starter plan)
If you’re staring at a fresh setup or you’re renovating a corner of your home to be cat-friendly, here’s a simple, incremental plan that won’t overwhelm you.
Day 1:
- Choose a base litter and switch one box to silica crystals or a corn-based litter. Keep the other box as your “control.”
- Place the two boxes in vented spots away from busy traffic and feeding areas.
- Add a small, quiet fan or a compact purifier near the litter zone but not directly in the cat’s line of sight.
Day 2:
- Add a light baking-soda sprinkle into the new litter and test your cat’s reaction. If your cat seems unsettled, cut back and adjust the ratio.
- Start a daily 5-minute check-in: scoop, smell, note any changes in odor, and adjust.
Week 1:
- Deep clean cycle begins to settle in. If you have a liner, change it at least every 3 days.
- Introduce a gentle DIY deodorizer in the scoop area—no heavy scents, just a whisper of aroma.
Week 2:
- Evaluate airflow improvements. If needed, reposition the fan and re-check the spray area’s scent.
- Decide whether to keep two boxes or consolidate to one if your space is small. If keeping two boxes, ensure both have good ventilation and aren’t boxed into tight corners.
Week 4:
- Reassess litter choices. If the odor remains stubborn, consider a swap to another natural litter or a refined silica option after confirming your cat’s acceptance.
- If you’re happy with the setup, establish a weekly deep-clean ritual and a monthly audit: check liners, test the deodorizer, confirm the ventilation setup, and adjust as needed.
The point is to create a system you can repeat without hesitation. Odor control isn’t glamorous, but it’s repeatable, measurable, and—most importantly—cat-friendly.
When to escalate and what to watch for
- If you notice persistent odors despite regular scooping and a solid base litter, re-check ventilation. A small change—like moving a box to a more ventilated corner or adding a purifier with a carbon filter—can make a big difference.
- If your cat starts avoiding the box, don’t punish it. Try a softer approach: change the litter brand, switch to a different texture, or move the box to a quieter spot. Cats often cue off smell and territory.
- If you’re trying essential-oil-based scents, stop. Some cats react badly to certain essential oils in ways you might not predict. Always test in a small area away from the box and observe for signs of nasal irritation or changes in appetite.
A quick reference: what actually works best (summary)
- Start with a good base: natural litters or silica crystals—both have strong odor-control potential.
- Layer safe additives: baking soda in moderation, activated charcoal where appropriate, and enzymatic cleaners after deep cleans.
- Optimize airflow: ventilate the room, avoid tucked-away boxes, and consider a small purifier or fan to move air.
- Maintain a simple cleaning schedule: deep clean every 2–4 weeks, scoop daily, liner changes every 3 days if you can manage it.
- Use DIY deodorizers sparingly and safely: lightweight blends that you can test with your cat’s comfort as the barometer.