Getting Started with Tiny-Timer Toolkit: Quick Setup for Calm Road Trips
May 12, 2026 • 9 min
If you’re a parent who has driven more than 3 hours with a car full of kids, listen up. A simple system can turn a potential disaster into a surprisingly calm journey. The Tiny-Timer Toolkit is that system when you use it the right way: clear placement, quick scripts, and pocket-cards that kids can actually grab onto. This isn’t a gadget sermon. It’s a real-world setup that works, with tweaks I’ve learned from road trips that felt like “the longest nine hours of my life” and trips that felt like a breeze.
I’ve used this on three long weekend routes and one full cross-country trip with two kids, ages five and seven. The outcomes weren’t magical, but they were measurable: fewer interruptions, more predictability, and a shared sense that the drive could be part of the trip rather than the punishment before the payoff. And yes, there were moments of resistance—child-edge emotions and a stubborn refusal to switch “Now” cards at the exact moment I expected. We weathered those with a few tweaks and a lot of patience.
Here’s how to set it up, what to say, and how to lean into the little details that make a big difference.
And a tiny moment I’ll never forget: we were cruising through a long stretch of monotonous highway, the kids quietly looking at a card in the “Now” slot, the timer ticking down with a soft chime. My eight-year-old whispered, “I like knowing what comes next.” The car felt lighter. It wasn’t about control; it was about clarity. That moment stuck with me because it showed how a small visual cue can shift a ride from “drag” to “driving together.”
If you’re worried about the setup being too fussy, you’re not alone. The goal is not to create a perfect science experiment you’ll abandon after one trip. It’s to craft a portable system that feels natural within your car, your kids’ personalities, and your routine.
Why a timer helps (in plain language)
Kids crave predictability. A road trip is a giant disruption: different seats, new snacks, unfamiliar scenery, and a long timeline that can feel endless. A visual timer gives them a concrete sense of time passing. It’s simple, tactile, and nonverbal—perfect for younger children who haven’t mastered abstract time yet.
When I started using the Tiny-Timer Toolkit, I was surprised by how much it reduced “Are we there yet?” chatter. It didn’t erase it completely, but it redirected the energy from negotiating every minute to negotiating activities. The timer becomes a cue to switch gears, not a weapon in a battle for control.
The science isn’t the point here, but it helps to know there’s research backing this approach. Visual schedules and timers have been shown to reduce challenging behaviors and parental stress in various child populations and settings, including travel contexts. The idea is simple: predictability reduces anxiety, and predictability plus choice reduces resistance.
Here’s a quick truth I learned the hard way: you can’t force a kid to be excited about every card. You can, however, set up a system where they know the rules, feel involved, and experience small wins. That combination changes how a child responds on the road.
How I actually made this work
Below is the practical blueprint I use, with the exact moves I made, not idealized instructions that sound good but aren’t actionable on the road.
Step 1: Place it where your child can see and reach it
You want visibility without distraction for the driver. I learned this the hard way after a trip where I placed the timer too high and the kids couldn’t really engage with it.
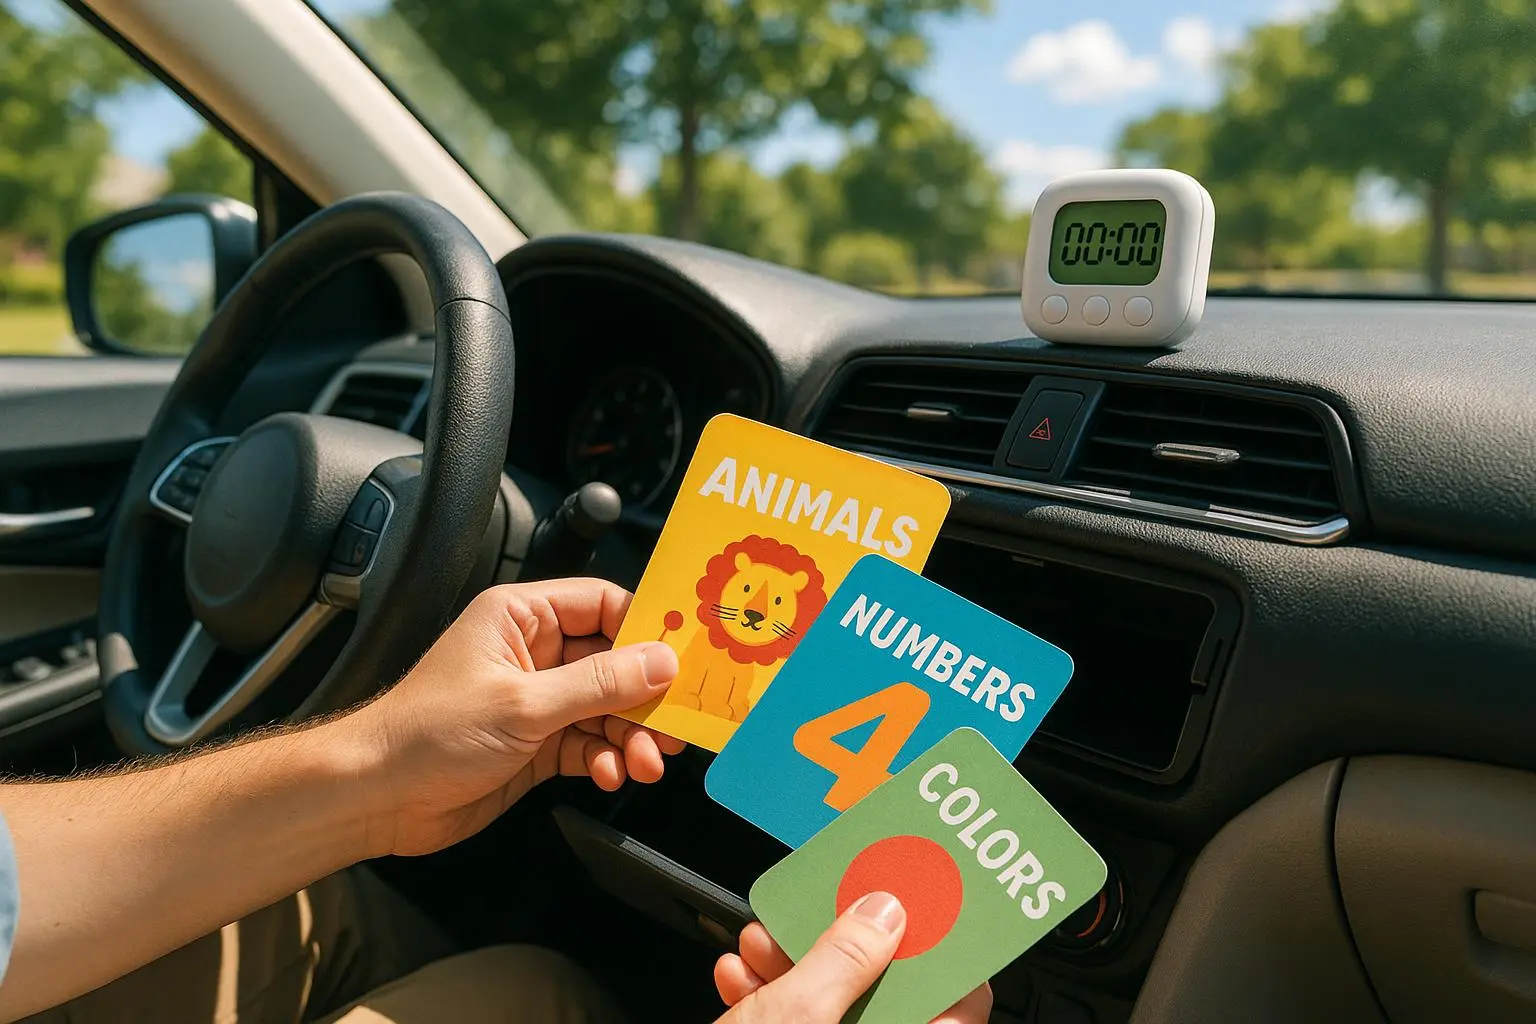
- Timer placement: Mount the main Tiny-Timer unit on the back of the front passenger seat headrest, using a strap or clip that stays secure but is easy for a kid to grab. Eye-level for most kids works best. If your child is shorter or you sit in the back, a slightly lower angle helps them notice the countdown without turning their head away from the road.
- Pocket-card holder: Attach the fabric pocket-card holder just below the timer or on the side of the child’s car seat. The goal is easy access so they can flip to a new card without pulling you into the process.
User insights from real families echo this. One parent noted moving the timer “lower, right at her eye level” made engagement stick. Another parent loved the “Now” and “Next” slots because it gives a clear rhythm to what’s happening.
Tip: Start with a quick pre-trip check. Sit next to your child, point at the timer, and say a single line: “We’re going to time our next activity. When the timer ends, we switch cards.” Keep it short, friendly, and confident.
Step 2: Build your quick scripts (short and repeatable)
Consistency is the secret sauce. The scripts should be easy to memorize and repeat, so your child knows what to expect without you turning into a drill sergeant.
- Introducing an activity: “Okay, it’s [Activity Name] time. We have [X] minutes until the next stop. Put the [Activity Name] card in the ‘Now’ slot.” Example: “Okay, it’s audiobook time. We have 20 minutes until our snack. Let’s put the audiobook card in the ‘Now’ slot.”
- Timer nearing end: “Look, the timer is almost done. Just [X] minutes left for [Activity Name]. What’s next on our cards?” Example: “Look, the timer is almost done. Just 5 minutes left for drawing. What’s next on our cards?”
- Transitioning: “Timer’s done. Great job with [Activity Name]. Now it’s time for [Next Activity]. Let’s switch the cards.” Example: “Timer’s done! Great job with your puzzle. Now it’s time for a stretch break. Let’s switch the cards!”
I’ve found these phrases work best because they’re brief, positive, and predictable. If your child loves a particular line, keep it and use it consistently.
A note on tone: you don’t have to sound like a drill sergeant. A calm, upbeat voice works. If you’re tired, it’s okay to pause and retry with a softer cadence. The few seconds of calm you bring to the moment often matter more than the exact words.
Step 3: Use pocket-cards to create a little map of the trip
The cards are more than pretty pictures—they’re a menu of activities and transitions. Most kits come with common options like “Listen to Music,” “Snack Time,” “Look for Red Cars,” “Quiet Time,” “Story Time,” and “Rest Stop.” You can customize, laminate, and even create new cards for things that feel special to your family.
- Pre-trip prep matters: Before you leave, go through the cards with your child. Let them pick a few activities they want to do in a certain order during the trip. This gives them agency and reduces pushback.
- The Now/Next slots: The pocket-card holder almost always has a Now and a Next slot. Put the current card in Now and the upcoming one in Next. If the trip is longer, you can add a Later slot. The visual sequence helps kids anticipate changes without constant nagging from you.
- Activity rotation: When the timer ends, invite your child to pick the next card. It’s a tiny act of choice that can dramatically improve cooperation.
Real-world micro-insight: a parent on a parenting board shared that their son loves picking the next card. It makes him feel in charge and, frankly, saves the parent from constant suggestion. For many kids, that sense of control matters more than the actual activity.
Step 4: Master the advanced bits (but keep it practical)
- Be flexible: The timer is a guide, not a tyrant. If a child is deeply engaged, you can extend a minute or two. The key is to stay attuned and follow the rhythm you’ve set, not break it every few minutes.
- Positive reinforcement: Praise when transitions go smoothly. A simple, “You did a great job finishing your drawing when the timer went off!” can reinforce the behavior you want.
- Involve siblings: Older kids can take on small caretaker roles—monitoring the timer or helping younger siblings switch cards. It builds teamwork and reduces your workload.
- Custom cards: If a family has a favorite activity that’s not on the cards, print your own. Laminate for durability. The more personally meaningful the cards, the more likely they’ll be used.
A small anecdote here: we once added a “Trip Surprise” card that we revealed only if the kids cooperated for a full hour without a single meltdown. It wasn’t grand, but the anticipation of something new created a positive pressure to stay engaged.
Step 5: Tackle common concerns without drama
- Skepticism about gadgets: Many parents worry about “one more gadget.” The Tiny-Timer Toolkit isn’t about forcing behavior; it’s about offering a clear, nonverbal framework that kids can understand and internalize. If you approach it with patience, you’ll see that it’s less about control and more about shared expectations.
- Mixed feedback: Some families report a learning curve. That’s normal. We all learn as we go. The payoff comes after a handful of trips when the system becomes familiar enough to feel almost invisible—like a natural rhythm the road hums along with you.
- Resistance from kids: It helps to give kids a sense of ownership from the start. Let them co-create a few cards and choose the order for a stretch of the trip. When kids feel heard, they’re more willing to engage with the system.
One parent described it simply: “It’s not perfect, but on average, our drives are much calmer. The quiet-time card is a lifesaver.” If you can get that kind of relief even part of the time, it’s worth the setup.
Real-world setup stories (short but meaningful)
Story 1: The cross-country test run We took a two-week road trip from the Pacific Northwest to the Grand Canyon. The car held three kids under eight, a dog, and enough snacks to open a small bakery. The Tiny-Timer Toolkit sat on the back of the front seat, with a pocket-card holder just within reach. The first 90 minutes were the usual chaos—squealing about seat belts, someone asking “Are we there yet?” every two minutes, and a nagging sense that the day would end in a meltdown. Then we started using the Now/Next system and the pre-trip card planning. By midday on Day 2, the kids asked to set up the cards themselves. The trip transformed from a tense march into a collaborative game. The standout moment happened near Moab: a long stretch, the timer counting down, and the kids calmly pointing at the cards to choose the next activity. We arrived with energy to spare for hiking and a family story that would be told for years.
Story 2: The three-hour stretch On a routine three-hour drive to visit grandparents, we encountered a stubborn mood from one child who didn’t want to “move on” from a drawing card. We paused the timer, re-framed the transition with a gentle reminder, and offered a small reward—extra time for a favorite road-game if the next card choice was cooperative. The mood shifted within minutes. The card rotation felt less like a demand and more like a mutual agreement: we’ll grow this portion of the trip together.
If you’re curious about how this translates to the research, studies on visual schedules and predictability show similar gains in reducing distress and improving engagement when kids have a clear sense of what comes next. The anecdotes above aren’t proof in a lab, but they’re consistent with the patterns researchers describe.
The pocket-card magic (and what to put on yours)
Pocket-cards are your lightweight, repeatable moments. They’re simple to customize and laminate so they withstand the abuse of highway dust and car-seat straps.
- Core cards to start with: Listen to Music, Snack Time, Look for Red Cars, Quiet Time, Story Time, Rest Stop.
- Build-in extras: Draw Time, Mini-Quiz (kid-friendly), Look for Landmarks (e.g., “find a wind turbine” or “spot something blue”), Surprise Card (only revealed if the timer completes a full cycle).
- Personalization is worth it: add cards tied to your itinerary—e.g., “Park Stop at Mile 214” or “Ice Cream Break at the Next Exit.” Kids feel the trip is becoming theirs, not just yours to shepherd.
A few practical tips:
- Pre-select a small pool of cards you know your kids enjoy.
- Include a couple of “low-energy” options for days when everyone is tired.
- Laminate and punch holes to thread onto a ring, so you can add or remove cards quickly.
The research behind visual engagement supports these tactics. Visual schedules and choice-based rotation can reduce anxiety and improve compliance with transitions. The practical takeaway is that kids benefit from a predictable rhythm and a sense that they’re part of shaping the trip.
A few quick best practices you can start today
- Start small: One timer, five cards, two scripts. See how that flows for a single outfit-trip before you scale up.
- Involve your kids: Let them pick a couple of cards and the order for portions of the trip. Ownership matters.
- Keep it moving, but not rushed: You want a calm pace, not a speed-run. If the timer ends and nothing feels ready to switch, keep it in the current activity for another minute or two.
- Reflect after each trip: Ask, “What worked best?” and “What made transitions harder?” Make a tiny tweak to your scripts or placement and try again next time.
If you’re reading this and thinking, “This sounds good, but will it work for my family?” I’ve been there. My own road trips improved when I gave the system time to settle, rather than expecting miracles on the first run. The payoff isn’t perfect behavior every minute; it’s a calmer crew with a shared framework that everyone can understand.
Quick-start checklist
- Decide timer placement (back of front seat headrest) and attach pocket-card holder.
- Create a small initial set of cards (5-7) and laminate them.
- Write two or three simple scripts and practice them with your kids at home.
- Do a short test drive to tune the rhythm (eye level, voice tone, and card rotation).
- On longer trips, pre-plan a couple of “surprise” or “bonus” moments to sustain motivation.
If you follow this approach with patience, you’ll begin to feel a shift in your car. It won’t remove all the friction—kids are kids, and road trips are adventures in giving up control—but it will give you a shared playbook for how to move through the miles with more ease.
Final thoughts
The Tiny-Timer Toolkit isn’t a magic wand. It’s a practical, human-friendly system that gives kids structure and a sense of control while giving you a reliable framework to lean on. Done well, it turns long drives into a sequence of small, doable moments rather than one big, looming challenge.
I’ve seen the difference in real trips, with real kids, and I’ve felt the relief in the air as the car settles into a smoother, more predictable rhythm. Small changes—where the timer sits, how you describe the next step, which card comes next—add up to meaningful improvements over the course of a day or a weekend.
If you give it a try, I’d love to hear how it lands in your family. Is there a small tweak that made your trip calmer? Did a particular card or script spark a moment of calm you didn’t expect? Share the wins, the misfires, and the learnings. Road trips should be about the journey, not the arguments.
Happy travels, and may your next mile-marker count as a win for everyone in the car.