Toy Hygiene & Replacement Rules: When to Clean, Fix, or Toss Your Dog’s Toys
Jul 8, 2026 • 9 min
Your dog’s toys are more than just playthings. They’re aids to mental stimulation, keepers of dental health, and little anchors of routine for your pup. But toys aren’t forever. They collect slobber, mold, and micro-tears, and some wear and tear can hide real hazards. This guide is my attempt to keep playtime safe without turning your house into a laboratory.
The goal here isn’t fear-mongering. It’s a simple, repeatable system you can actually use. Think of it as a weekly ritual you can hand to a pet sitter, a daycare staffer, or yourself when the calendar fills up. The point is to know when to clean, how to clean, and exactly when to retire a toy before it bites you—and your dog—back.
And yes, I’ll share a real, hands-on story from my own experience. It happened a few winters ago, when I was housesitting a terrier mix named Niko for a long weekend. Niko was a toy fanatic. Between fetch sessions in the living room and a quick zoomies lap around the kitchen, the two of us built a fairly impressive toy ecosystem: squeaky plushies, rubber bones, rope toys, and a handful of indestructible-looking fetch balls. On the second night, I noticed a damp, musty smell coming from a plush toy that had survived countless cuddles. I thought, “Probably nothing.” By morning, Niko had a wet nose and a cough that wouldn’t quit. A quick check revealed the toy’s seams were frayed, stuffing poking out, and a squeaker half-broken. I learned a hard lesson: the toy that looks worn-out is often safer to retire than the one that still looks “fine.” We swapped in a fresh plush and a few safer plastic toys, and the cough cleared within 24 hours. Since then, I’ve treated a toy’s appearance as a legitimate health signal, not a sentimental cue. A tiny moment that stuck with me: the moment I realized I could feel safer by reaching for the trash can a beat earlier than I expected.
Quick aside: the 30-second moment that sticks with me is the little data point that changes everything. If a toy is damp, it’s not just dirty—it’s a mold factory waiting to sprout. That doesn’t mean you throw away every damp toy immediately, but it does mean a quick, decisive decision to retire certain types (especially plush) after signs of dampness or mustiness.
Now, let’s break this down into something you can actually follow.
How I actually make this work
Here’s the practical rhythm I use at home and recommend for sitters or daycare staff. It’s simple, scalable, and designed to reduce risk without making you become a toy-cleaning wizard.
- Step 1: Identify toy families
- Step 2: Set a baseline cleaning cadence by toy type
- Step 3: Apply material-specific washing methods
- Step 4: Do a quick safety inspection
- Step 5: Follow a clear replacement timeline
- Step 6: Use a printable safety checklist for care teams
Let me walk you through each step with concrete actions you can copy today.
1) Identify toy families (and why it matters)
Not all toys are created equal, and treating them the same is a common mistake. A quick taxonomy makes ownership way easier:
- Plush and fabric toys: cuddly, snug, great for teeth but soak up water, harbor mold, and hide bacteria inside stuffing.
- Rope toys: strong, interactive, but the fibers trap moisture and can shed fibers that your dog might chew into the mouth or gut.
- Rubber and hard plastic toys: durable, easy to sanitize, and less likely to retain moisture, but they can crack or crack if chewed aggressively.
- Outdoor/fetch toys: often dirtier, ball-equipped, and exposed to the elements; they need more frequent surface cleaning and periodic deep cleaning.
When you know which family a toy belongs to, you can apply the right wash routine without overthinking it. It also helps you train sitters with a clear standard rather than “just wash the plush ones because they look dirty.”
2) Cleaning cadence by toy type (and a simple rule of thumb)
A practical cadence keeps you from turning toy maintenance into a weekly scavenger hunt. Here’s what I use, based on real-world experience with dogs who love to destroy, but who hate being bored.
Plush and fabric toys
- Clean frequency: Bi-weekly to monthly, depending on use and odor.
- Reason: stuffing and seams trap moisture; mold can develop quickly in damp spaces.
- Quick check: if it holds odor after washing or has a damp squish, retire it.
Rope toys
- Clean frequency: Weekly if your dog is a heavy chewer or uses the rope daily.
- Reason: fibers and knots trap moisture; exposure to saliva can speed up wear and bacterial growth.
- Quick check: if fibers start to fray or smell, consider retirement or replacement.
Rubber and hard plastic toys
- Clean frequency: Every 1–2 weeks; more often for outdoor use.
- Reason: easier to sanitize, less risk of hidden mold, but cracks can hide hazards.
- Quick check: cracks, sharp edges, or missing pieces = retire or replace.
Outdoor and fetch toys
- Clean frequency: Surface rinse after each use; deep clean weekly.
- Reason: dirt, grass, and bacteria collect quickly when toys are left in mud or water.
- Quick check: if a toy is excessively worn or pieces come off, retire.
A simple rule I cling to: if a toy looks or smells off, it’s already telling you it needs your attention. Don’t wait for it to get dangerous.
3) Material-specific washing techniques (the practical how-to)
We’ve got to get granular here. The goal is clean, not harsh, and to preserve toy integrity where possible.
Plush & fabric toys
- Method: Run in a mesh bag on a cold or warm gentle cycle with unscented, dye-free detergent. If you’re worried about the stuffing, you can add a half-c cup of white vinegar to the rinse cycle to cut odors.
- Drying: Air-dry completely. If the label allows, tumble dry on low heat for a few minutes to fluff and dry faster.
- Caution: Avoid bleach and high heat, which can degrade fabric and irritate skin.
Rope toys
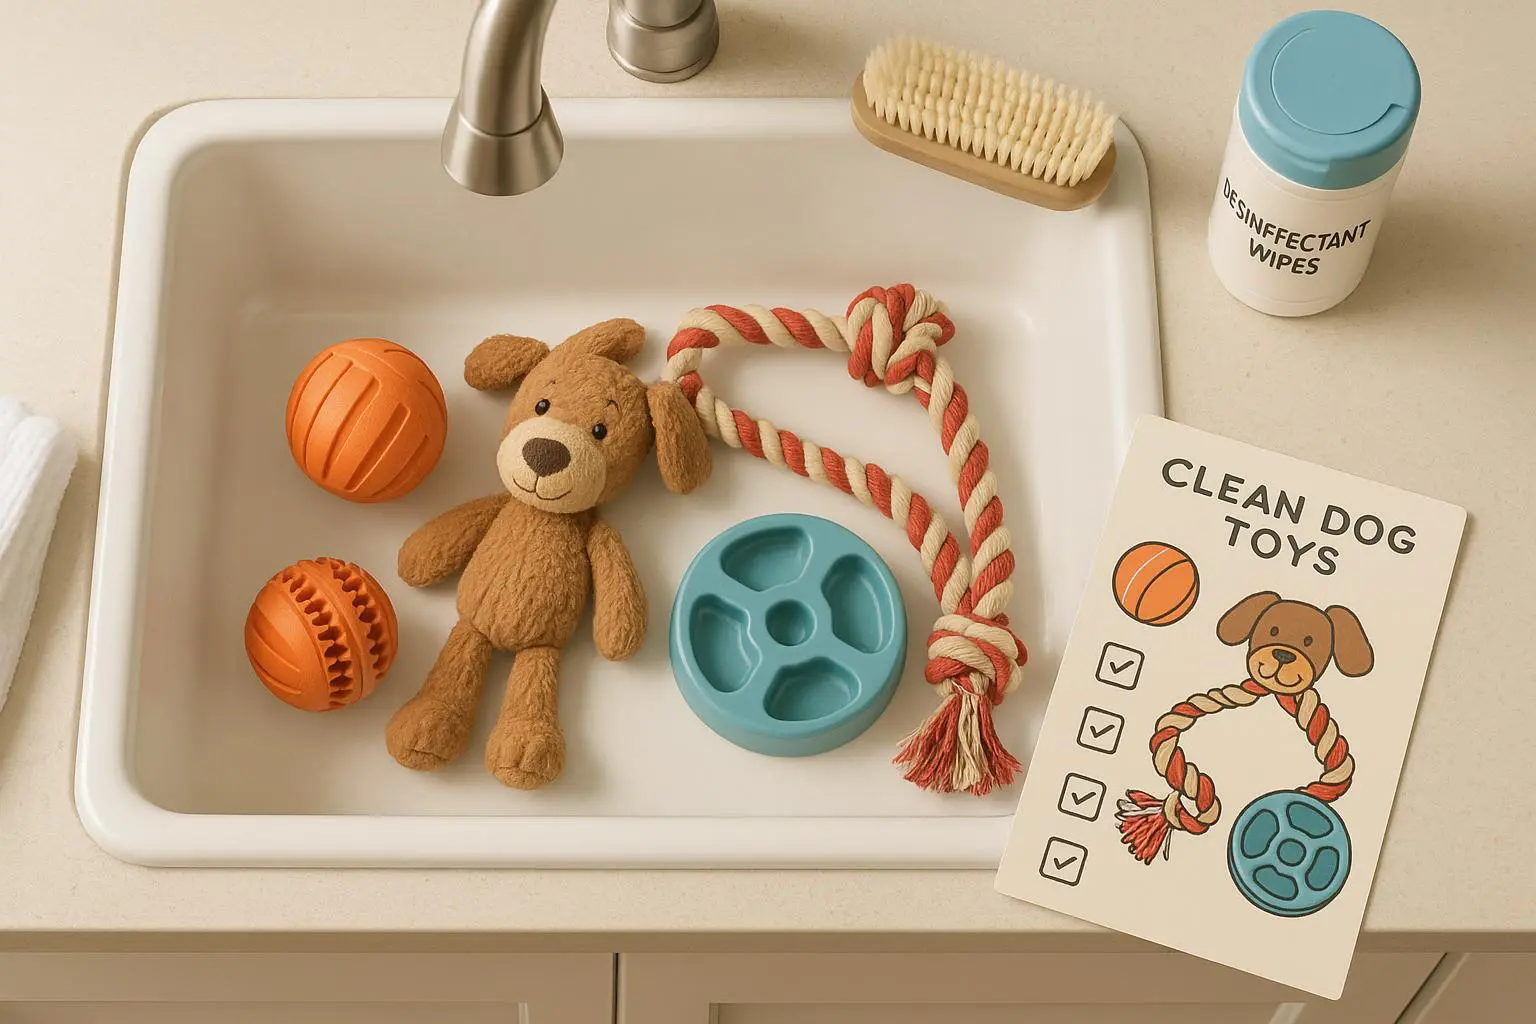
- Method: Soak in a vinegar-water solution (1:1) for 10 minutes, then gently scrub with a brush. If they’re machine-washed, use a laundry bag or pillowcase to protect your washer.
- Drying: Dry thoroughly—sunlight or a low-heat dryer works well. Mold loves moisture, so thorough drying is essential.
- Caution: If the rope shows deeper fraying or has unraveling fibers, retire it.
Rubber and hard plastic toys
- Method: Wash with warm water and a pet-safe dish soap. For deeper disinfections, a soak in a vinegar-water solution (1:1) works, too.
- Drying: Air dry completely. A quick dry cycle on a dishwasher top rack (without heat or with the sanitize option if available) can be convenient for some items.
- Caution: If a toy cracks, leaks, or has sharp edges, retire it.
Outdoor/fetch toys
- Method: Rinse after use, then deep-clean weekly with mild dish soap. For stubborn stains or odors, a vinegar solution helps.
- Drying: Make sure they’re completely dry before storing to prevent mold.
Important caveat: not every toy is dishwasher-safe. If you do use a dishwasher, top rack only and avoid heated drying unless the toy is explicitly labeled dishwasher-safe.
Micro-moments you can tuck away: the dishwashing option is often the easiest for hard toys, but you’ll save energy and time by rinsing immediately after use and then doing a deeper wash on a schedule. The real win is consistency, not complexity.
4) Small-part risk checks: what to look for (and what to do)
No amount of washing can fix a broken toy if a small piece could be ingested. Here are the critical warning signs, plus the actions I take in response.
- Missing or loose parts (eyes, noses, squeakers)
- Dangling bits or frayed edges
- Chewed or torn seams exposing stuffing
- Pieces small enough to swallow
Action: If any of these are present, retire the toy immediately. Don’t gamble with a dog’s health for sentimentality. A squeaker that’s loose can become a choking hazard, and a torn seam is a gateway to infection from hidden bacteria.
A quick safety mindset: separate a few “retire” bins. One bin for hard tosses, another for toys you’re not sure about. The moment you suspect danger, move the toy to retirement.
Real-world example: a squeaky plush toy that looked intact suddenly produced a hidden seam tear during a fetch session. The squeaker popped out and got swallowed by a dog who then needed a trip to the vet. The cost wasn’t just financial; it was the stress and downtime. That experience reinforced the habit of retire-at-the-first-glimpse-of-tear rule we now follow.
5) Replacement timeline: when to toss, not fix
Sometimes, repairing a toy isn’t worth the risk. The replacement timeline I use (and that I recommend to sitters and daycare staff) is straightforward and evidence-informed.
Plush toys
- Replace when there’s stuffing exposure, a tear that won’t seal, or a missing/loose squeaker.
- If the toy has a persistent odor after washing, replace it.
Rope toys
- Replace when fraying is extensive, fibers unravel, or the toy becomes too short to be safe.
Rubber/plastic toys
- Replace when there are deep cracks, sharp edges, or missing pieces that could leak out and injure the mouth or digestive tract.
All toys
- If safety is in question, replace. If you have heavy chewers, budget for more frequent rotation and replacement so you’re not playing the “wait-and-see” game.
A practical mindset: you’re paying a little more upfront to prevent vet bills and avoid emergencies. For many families, that trade-off is a no-brainer.
Some voices from the field to give you a sense of the thinking:
- A breeder friend keeps KONGs in bulk; when they flatten or lose their bounce, they retire them. He likens it to tires—when worn, they’re dangerous.
- A daycare operator notes that “safety first” isn’t just a slogan; it’s a standard that keeps dogs safer, happier, and more engaged in enrichment activities.
If you’re wondering about repair vs. replacement for cost control, my takeaway is simple: don’t gamble with pieces that could be swallowed. If it’s questionable, replace it.
6) The printable toy-safety checklist (for sitters & daycare staff)
A one-page checklist makes it easy to hand off to anyone taking care of your dog. Here’s a streamlined version you can print and keep in a binder or clipboard.
- Inspect every toy for missing parts, fraying, or sharp edges.
- Check for exposed stuffing or torn seams.
- Remove any toy with small, loose, or dangling parts.
- Clean toys according to material (see above).
- Toss any toy that is unsafe or beyond cleaning.
- Wash hands after handling dirty toys.
- Store clean toys in a designated, dry area.
A quick tip: keep a “retired” bin separate from the “in-use” bin. When you rotate toys, you’ll minimize the risk of reintroducing a hazard.
The science behind the practice (in plain language)
You don’t need a biology degree to understand why this matters. Doggy mouths aren’t sterile; they’re a moving lab of bacteria, yeast, and a few mold spores if moisture lingers in a toy. Plush and rope toys are especially at risk because their fabrics create tiny pockets where moisture loves to hide.
- Bacteria like E. coli and Staphylococcus species can linger on toys that are left damp or dirty.
- Mold and mildew grow in damp fabric; that’s where symptoms like coughing, sneezing, or itchy eyes can start in sensitive dogs.
- Frequent, proper cleaning reduces microbial load, and timely retirement reduces exposure to mechanical hazards (like choking on a loose squeaker or a torn seam).
Bottom line: a well-maintained toy routine isn’t about being fastidious. It’s about reducing health risks—without turning clean-up into a full-time job.
A quick note on the broader picture
Toy hygiene sits at the intersection of pet health, caregiver responsibilities, and the realities of busy households. If you’re running a daycare or boarding facility, the logical structure of this system pays off quickly: fewer emergency visits, happier dogs, and an easier day-to-day workflow. The printable checklist is specifically designed for caregivers who manage many dogs at once; it helps ensure everyone’s on the same page.
If you’re a home owner, you can adopt a lighter version: a weekly “deep clean” for the toy bin, a quick daily wipe-down for the most-used items, and strict retirement rules for anything suspicious. The goal is steady, predictable behavior—not perfection.
And if you’re curious about equipment that might help, a few practical additions can make a real difference: a mesh wash bag for delicates, a small scrub brush for stubborn seams, a vinegar spray for odor control, and a simple “retired” bin that sits out of the way but is easy to access.